
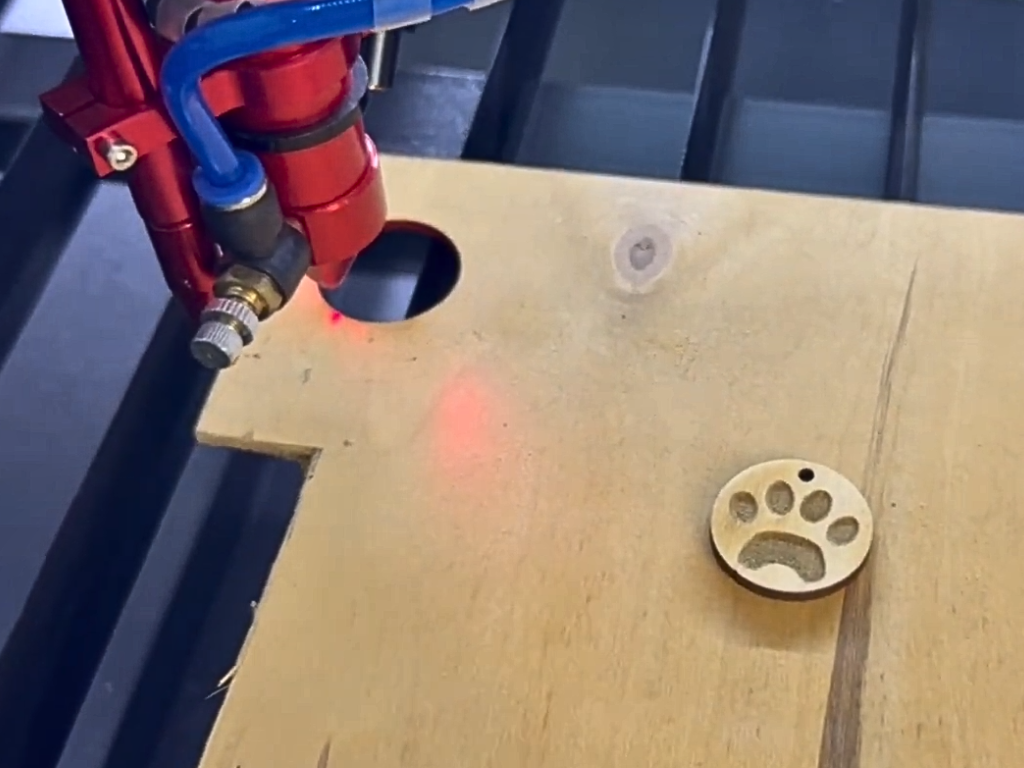
A CO₂ laser engraves wood readily, but repeat production exposes problems that a first test can hide: brown halos around letters, sticky residue, charred plywood edges and inconsistent contrast across oak grain. Excess heat and redeposited smoke are usually the causes. Use the seven steps below to control them, and test on offcuts from the same batch. Tube, lens, species and moisture all affect the result. The settings cited here illustrate particular setups.
Where scorching and residue come from
A focused CO₂ beam vaporises and chars cellulose and lignin. Heat spreads along the fibres beyond the engraved line, while smoke from resin and oils settles as a dark, sticky deposit. Drier, low-resin wood generally leaves lighter edges. Hardwoods tend to engrave darker than softwoods, and MDF cut edges can become very dark. Control energy per unit area, smoke flow and the resin or adhesive in the stock.
1. Mask the surface with PVC-free paper
Apply removable paper masking tape or paper transfer tape over the work area. The laser engraves through it and residue settles on the paper. Masking is most useful on large areas and less suitable for very fine detail or photo engraving. Use only removable, PVC-free tape. Laser processing PVC releases corrosive, hazardous fumes, including hydrogen chloride. Do not use self-adhesive vinyl. Masking takes slightly more energy to penetrate and can lift delicate features. On small items, cleaning after engraving may be more practical.
2. Use air assist and extraction
A small nozzle beside the lens directs compressed air at the work, clearing smoke and hot gases before they settle and keeping deposits off the optics. Effective extraction is essential because wood produces substantial smoke and dust. Route the smoke down or sideways towards the outlet without dragging it over the fresh engraving. A dark haze towards the outlet can indicate weak extraction or insufficient air assist.
3. Set focus for the effect you need
At focus, the small spot gives a narrow, sharp and relatively light mark. The machine manufacturer describes a Z offset of roughly 0.5–2 mm as a way to darken the mark: the broader spot heats more of the surface. Refocus whenever material thickness changes. For a dark inscription on light beech, try deliberate defocus at reduced power before increasing power at focus and burning a groove and halo. The manufacturer recommends 1.5″ or 2.0″ focal lengths for engraving. The standard 2.5″ lens on the RBL 9060 is selected for cutting. Ask about a shorter lens for fine photo engraving.
4. Balance power, speed and passes
Too much power or too low a speed gives a brown halo and a deep charred groove. Too little energy leaves a faint mark. Oak and cherry typically need more power than balsa or poplar. For clean edges, start at moderate power and higher speed, then build depth with additional passes. Lasertrade describes two to three passes at reduced power and gives a separate deep-engraving example of 0.5–1 mm at full power and half speed. For relief, the machine manufacturer describes multiple high-power passes followed by one or two cleaning passes at medium power and high speed. If halos darken with each pass, pause for cooling or reduce power. Save a labelled power-and-speed test grid from the same batch.
5. Match grain direction, scan mode and resolution
Heat travels differently along and across the grain. Dense latewood and softer earlywood can give alternating dark and pale bands, particularly in oak and conifers. Where possible, run raster lines along the grain. Raster fills distribute energy across thin scan lines. A vector outline concentrates it along one path and generally needs less power. Use a narrow raster fill for an outline without a pronounced groove.
Closely spaced scan lines overlap and reheat the wood, while wide spacing leaves bands. The manufacturer cites 333 dpi for photo engraving on wood. Its settings notes call for PPI to be a multiple of DPI and list ordered dithering at 125–250 dpi for relief. Test spacing at which adjacent laser spots just meet.
6. Clean after engraving
Remove the mask, then brush or vacuum along the grain before wiping. Lasertrade lists water, denatured alcohol and WD-40 for residue removal. A cloth lightly dampened with water or isopropyl alcohol can lift residue along the grain without working it into the pores. Avoid soaking the surface: moisture raises the grain and can lift the face veneer of plywood. Use a brass brush only inside the groove on hardwood. Press and lift fresh tape to pick up small pieces of masking left in grooves.
7. Decide when to apply the finish
Finishing before engraving seals the pores and makes deposits easier to wipe off. Some finishes yellow at the edges or produce more smoke than bare wood. Check the coating data sheet and do not laser-process chlorine-containing finishes. Finishing after engraving protects exposed fibres but usually darkens a light mark, and a thick coat can fill fine details. Test a pre-applied finish for dark marks on light wood or light marks on dark wood. For relief or surfaces in service, try a thin sprayed coat after engraving and allow for darkening. Test the finish on the same offcut as the settings grid.
Which wood and plywood to use
| Material | Typical result under a CO₂ laser | Source |
|---|---|---|
| Beech, birch, maple, sycamore maple, ash, limewood | Light, even stock with good contrast for lettering and graphics | Lasertrade |
| Poplar, balsa | Lower power, lighter engraving | Machine manufacturer |
| Oak | Dense, more power, strong but uneven contrast | Machine manufacturer, Lasertrade |
| Cherry | Dense, dark engraving | Machine manufacturer, Lasertrade |
| Walnut | Dark background, low contrast. Consider tinting the engraving | Lasertrade |
| Ebony | Engraving is difficult to read | Lasertrade |
| Conifers, including larch and fir | Resin and uneven grain make settings difficult to reproduce | Machine manufacturer, Lasertrade |
| Interior-grade birch plywood with light glue | Suitable for engraving and cutting. Prefer light glue or laser-grade board | Lasertrade, machine manufacturer |
| Waterproof plywood with dark glue | Charred edges and dark glue layers when cut | Lasertrade, machine manufacturer |
| MDF | Easy to engrave and cut, with very dark cut edges | Machine manufacturer |
For repeat work, choose even-grained light hardwood or birch plywood with light glue. When the customer specifies walnut or another low-contrast stock, plan a trial and consider tinting the mark.
Diode or CO₂ for wood engraving?
Wood absorbs the 10.6 µm output of a CO₂ laser well. CO₂ cutters typically have tubes rated in tens of watts, air assist, a chiller and provision for extraction. Visible-light diode engravers typically provide a few to a few tens of watts of optical power and often use an open frame. CO₂ is generally faster for filled areas and can cut suitable plywood or solid stock in one pass. Diodes suit shallow marks on finished objects and small batches. Relief and thicker plywood take more passes. Compare both on your own job file.
Open diode units can be Class 4 and require appropriate guarding and eyewear. An interlocked CO₂ enclosure can qualify as Class 1. One manufacturer rates its enclosed machines Class 2 because of the pointer. Check the classification of the exact machine. See the workshop guide to diode, CO₂ and fibre lasers, the CO₂ laser cutter range and the RBL 9060, with a 900 × 600 mm work area, an 80 W tube (130 W optional) and a pass-through bed.
Relief and multi-pass 3D engraving
Grayscale controls depth: darker pixels receive more energy and cut deeper. Use several engraving passes followed by cleaning passes. Prepare the graphic with ordered dithering at a lower resolution than for photos. Uniform hardwoods such as beech or maple give more predictable depth than oak or conifers. Allow cooling between passes and supervise the machine. Dust in deep grooves can ignite.
Safety: ignition, extraction and supervision
CIOP-PIB notes the fire risk of Class 4 lasers. Wood, dust and offcuts are fuel. Air assist can reduce flames without eliminating the risk. Keep the machine attended and an extinguisher within reach, remove scraps from below the bed and clean resinous deposits regularly. Effective extraction keeps smoke and particulate matter away from the operator and the optics. A contaminated lens can overheat and crack. Never bypass the enclosure interlock.
Frequently asked questions
### How much laser power do I need?
The standard tube is sufficient for engraving. Test each batch, starting with less energy on soft woods. A higher-powered tube is useful for cutting, while clean engraving depends on controlling excess heat.
### Can a diode laser engrave wood?
Yes, especially shallow lettering and graphics on finished items. CO₂ is generally faster for fills, relief and plywood cutting. Compare both with your own file and verify the enclosure and classification.
### How do I remove smoke residue and scorch marks?
Start with a soft brush or vacuum, then wipe with a lightly dampened cloth without soaking the wood. A PVC-free mask or a fast cleaning pass at medium power can help on the next run.
### Can I engrave plywood cleanly?
Use interior-grade birch plywood with light adhesive or laser-grade board. Waterproof plywood tends to leave charred edges. See which materials a CO₂ cutter can process.
### Why does oak engrave unevenly?
Dense and soft bands respond differently to the same settings. Choose beech, maple or birch when you need uniform lettering.
Sources and editorial note
- https://mddp.artsrn.ualberta.ca/trotec-property-settings/
- https://www.ciop.pl/CIOPPortalWAR/file/99433/Ochrona_przed_promieniowaniem_laserowym_MatInf_M.Okrasa_I.PN.06.pdf
- https://lasertrade.pl/grawerowanie-na-drewnie
- https://zagrawerowani.pl/blog/grawer-drewna/
- https://roboteus.com/en/machines/plotery-laserowe-co2/co2-laser-plotter-rbl-9060/
- https://roboteus.com/en/machines/plotery-laserowe-co2/
These settings are starting points for tests. Results depend on the machine, tube, lens, species, moisture and batch. The source article cites workshop and manufacturer guidance as of October 2026. Follow the equipment instructions, coating and material data sheets, and applicable laser and fire safety rules.